Maintaining hygiene and sterilization in a dental clinic is very important to stop the spread of bacteria and viruses. It helps prevent cross-contamination and keeps both patients and staff safe.
The process starts with careful cleaning of all instruments, followed by proper sterilization, safe storage, and regular maintenance.
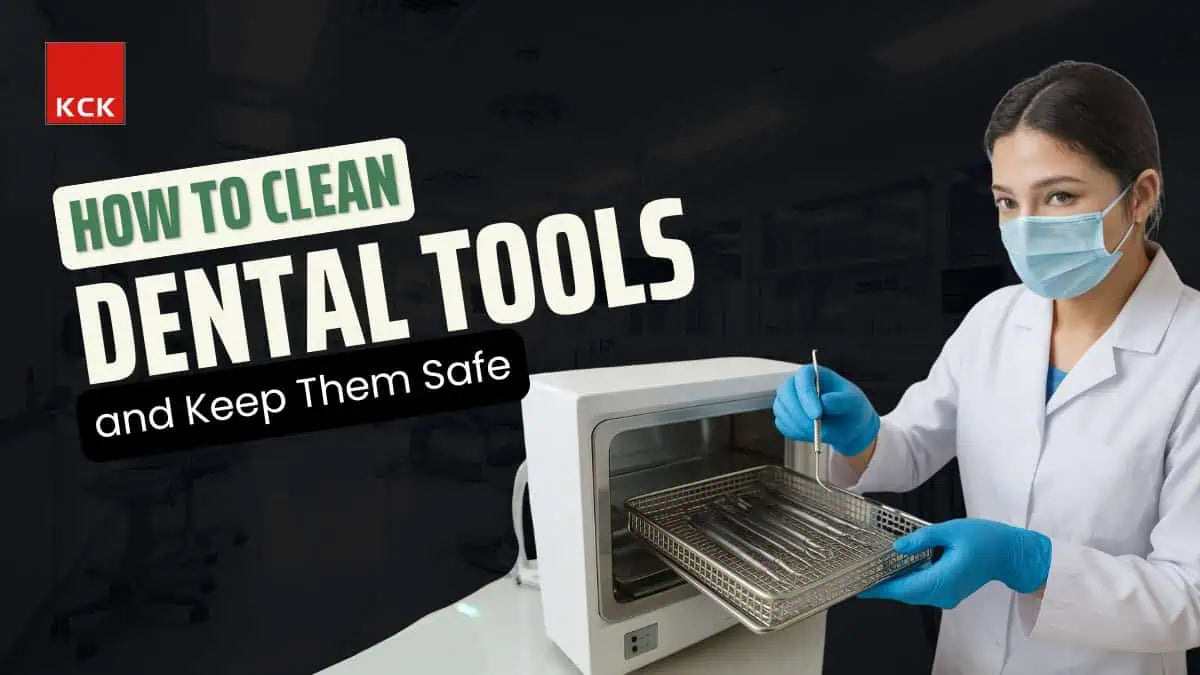
This guide explains the basic steps of cleaning, sterilizing, storing, and maintaining dental instruments to ensure a safe and healthy dental environment.
Why Dental Instrument Sterilization Matters
Sterilization is the foundation of infection control in every dental and clinical setting. It protects patients and staff from harmful diseases such as HIV and Hepatitis B and C, while also maintaining the clinic’s reputation for safety and professionalism.
Effective sterilization eliminates all forms of microbial life, including resistant bacterial spores, ensuring that instruments are completely safe for reuse.
It prevents cross-contamination between patients, reduces the risk of healthcare-associated infections, and protects vulnerable individuals with weaker immune systems.
For any procedure that involves contact with soft tissue or bone, using sterile instruments is essential to maintain a truly aseptic environment.
Strong sterilization practices also build trust and confidence among patients. When people see that a clinic follows strict infection control measures, they feel assured that their safety comes first.
On the other hand, a single lapse in sterilization can lead to infection outbreaks, legal issues, and serious damage to a clinic’s reputation.
By maintaining high hygiene standards, a clinic shows its ethical responsibility and commitment to providing safe, high-quality care, qualities that help it stand out in a competitive field.
Leading organizations like the CDC, ADA, and WHO have set clear guidelines for infection control. The CDC emphasizes proper instrument classification, thorough multi-step cleaning and sterilization, and regular monitoring with mechanical, chemical, and biological (spore) tests. Dental handpieces and intraoral instruments must always be heat sterilized after every patient.
The ADA supports these standards by recommending universal precautions for every patient, regular sterilizer checks, and continuous training for dental professionals.
Similarly, the WHO promotes its global “Clean Care is Safer Care” program, encouraging healthcare facilities to apply standard precautions, strengthen infection prevention systems, and routinely evaluate their effectiveness.
Proper sterilization not only minimizes infection risks but also improves workflow and treatment efficiency.
When staff follow clear protocols, instrument preparation and room turnover become smoother, allowing more focus on patient comfort and clinical excellence. Ultimately, consistent sterilization reflects a clinic’s integrity. It shows dedication to patient safety, ethical standards, and true quality care.
Types of Dental Instruments and Their Cleaning Requirements
|
Category |
Examples |
Sterilization Need |
|
Critical Instruments |
Surgical tools, scalers, forceps, scalpel blades, and dental handpieces |
These touch soft tissue or bone and must always be heat sterilized after every use to destroy all microorganisms and prevent infection. |
|
Semi-Critical Instruments |
Mouth mirrors, reusable impression trays, and dental amalgam condensers |
These contact the mouth or mucous membranes but don’t cut tissue. They should be heat sterilized whenever possible or disinfected with a high-level disinfectant if heat-sensitive. |
|
Non-Critical Instruments |
X-ray heads, blood pressure cuffs, face-bow components |
These touch only intact skin and pose a low infection risk. They don’t require sterilization but should be cleaned and wiped with an intermediate or low-level disinfectant after use. |
Step-by-Step Process: How to Clean Dental Instruments
|
Step |
Description |
|
1. Pre-Cleaning |
Remove visible debris or blood from instruments right after use. Keep them moist or in a holding solution to stop drying before cleaning. |
|
2. Manual or Ultrasonic Cleaning |
Clean instruments using a brush and detergent, or place them in an ultrasonic cleaner to remove dirt and contaminants effectively. |
|
3. Rinsing and Drying |
Rinse instruments thoroughly with clean water to remove all cleaning solution, then dry them completely to prevent rust and damage. |
|
4. Inspection |
Check each instrument carefully for any remaining debris, stains, or damage. Ensure all parts are clean and working properly. |
|
5. Packaging |
Pack the clean, dry instruments in sterilization pouches or wraps before placing them in the sterilizer. Label and seal them properly. |
How to Disinfect Dental Tools
|
Disinfection Level |
Agents Used |
Application |
|
High-Level |
Chemical sterilants, glutaraldehyde, and hydrogen peroxide solutions |
Use on heat-sensitive instruments that come into contact with mucous membranes or sterile tissue. Fully immerse the instruments and follow the manufacturer’s recommended contact time. |
|
Intermediate-Level |
Iodophors, chlorine compounds, phenolic disinfectants |
Apply to surfaces and instruments that come into contact with skin or lightly touch the mouth. Wipe or immerse according to instructions. |
|
Low-Level |
Quaternary ammonium compounds, mild detergents |
Use on non-critical surfaces and instruments that contact intact skin. Wipe thoroughly to remove contaminants. |
Sterilization Methods for Dental Instruments in Dentistry
|
Method |
Process Overview |
Duration |
Best For |
|
Autoclaving (Steam Sterilization) |
Uses high-pressure steam to kill all microbes and spores. |
15 - 30 minutes depending on load |
Most metal instruments, handpieces, and heat-resistant items |
|
Dry Heat Sterilization |
Uses hot air in an oven to sterilize instruments without moisture. |
1 - 2 hours |
Instruments that may rust or dull in steam, like some surgical tools |
|
Chemical Sterilization |
Uses liquid chemical solutions (e.g., glutaraldehyde) to sterilize instruments. |
6 - 12 hours, depending on the solution |
Heat-sensitive instruments and plastics |
|
Cold Sterilization |
It is immersed in disinfectant for a long period to kill microbes. |
6 - 10 hours |
Heat-sensitive items that cannot go into an autoclave or dry heat |
Storing and Maintaining Tips for Sterilized Dental Instruments
- Proper storage and maintenance of sterilized instruments are essential to protect patient safety and prevent infections. Keep instruments clean, dry, and in a controlled environment until use.
-
Store instruments in closed cabinets, drawers, or shelves to protect them from dust, moisture, and contamination. Advanced cabinets with HEPA filters or positive pressure can further maintain cleanliness. Always ensure instruments are completely dry before storage and maintain temperature between 18–23°C (64–72°F) with humidity below 60%.
- Seal instruments in appropriate sterilization pouches, wraps, or rigid containers that match the sterilization method used. Label each package with the sterilizer, cycle or load number, sterilization date, and, if needed, expiration date. Use a “first-in, first-out” system and consider electronic tracking with barcodes for better inventory management.
- Keep different types of instruments separate to prevent damage. Place delicate or microsurgical tools apart from heavier items, using trays or containers to avoid shifting. Handle packages gently with clean, dry hands and minimize contact to reduce contamination risk.
- Follow an event-related shelf-life approach: instruments remain sterile as long as the package is intact. Store packages off the floor, below the ceiling, and away from walls. Avoid stacking heavy sets; use trays or racks instead. Inspect packages before use; if any moisture, tear, or damage is found, reprocess the instruments.
- Use aseptic technique when retrieving sterile items: perform hand hygiene, touch only the outside of the package, and open it carefully away from your body. These practices ensure instruments stay safe, sterile, and ready for patient care.
Best Practices for Dental Clinics
-
Follow strict hygiene and sterilization procedures to protect patients and staff.
-
Always wear gloves, masks, and protective eyewear when cleaning or handling instruments.
-
Wash or sanitize hands before and after touching instruments to prevent germ spread.
-
Avoid direct contact with contaminated instruments and reduce unnecessary exposure.
-
Regularly check dental tools for signs of wear, damage, or corrosion.
-
Do not mix different metal types during sterilization to prevent rust or tool damage.
-
Train staff regularly on infection control and proper equipment maintenance.
-
Monitor sterilization indicators during every cycle to confirm full sterilization.
-
Use a first-in, first-out (FIFO) system to rotate stock and use older instruments first.
- Inspect instruments before every use; reprocess any damaged or compromised items.
Invest in high-quality dental tools, such as those from KCK Direct, to ensure reliability, durability, and safety. Following these best practices helps clinics provide safe, efficient, and professional care while protecting patients and staff.
Building Trust Through Certified Quality and Hygiene
Consistent cleaning and sterilization are essential to protect both patients and dental staff. Autoclaves remain the gold standard for sterilizing most dental instruments, effectively eliminating microbes and preventing cross-contamination. Proper storage and careful handling not only keep instruments safe but also extend their lifespan and maintain peak performance.
Investing in high-quality, CE-certified dental tools and autoclaves from KCK Direct ensures reliability across orthodontic, endodontic, and sterilization needs. CE certification denotes that a product meets strict European safety, health, and environmental protection standards. It guarantees that the instruments have been tested for quality, durability, and safe use in clinical settings. Using CE-certified tools reduces the risk of malfunction, supports precise treatment, and ensures both patient and practitioner safety. Maintaining strict hygiene standards and using certified equipment reflects a professional, trustworthy dental practice, giving patients confidence in the care they receive.
FAQ’s
How to clean dental equipment surfaces like chairs or lights?
Wipe down all surfaces with a suitable disinfectant after each patient. Use a clean cloth or disposable wipes and cover high-touch areas like armrests, light handles, and control panels. Make sure the surface stays wet with the disinfectant for the recommended contact time.
What disinfectant is best for dental instruments?
High-level disinfectants like glutaraldehyde or hydrogen peroxide solutions are best for instruments that touch mucous membranes or sterile tissue. For instruments that touch only skin, intermediate-level disinfectants like iodophors or chlorine compounds work well. Always follow the manufacturer’s instructions.
What’s the difference between cleaning and sterilizing dental tools?
Cleaning removes visible dirt, blood, and debris from instruments. Sterilizing kills all microbes, including bacteria and spores, to make the instrument completely safe for use. Cleaning always comes first because debris can block sterilization.
Can I disinfect dental tools without an autoclave?
Yes, you can disinfect dental tools without an autoclave by using chemical disinfectants or cold sterilization tools/solutions for heat-sensitive instruments. Fully immerse the instrument for the recommended time to ensure all microbes are killed. However, autoclaving is still more effective and reliable for most instruments.
How often should dental instruments be cleaned and sterilized?
Clean and sterilize instruments after every patient. Reusable instruments must go through the full cleaning and sterilization cycle each time to prevent infections and cross-contamination.
