


Orthodontic Tray Setup: Essential Instruments for Every Adjustment Appointment
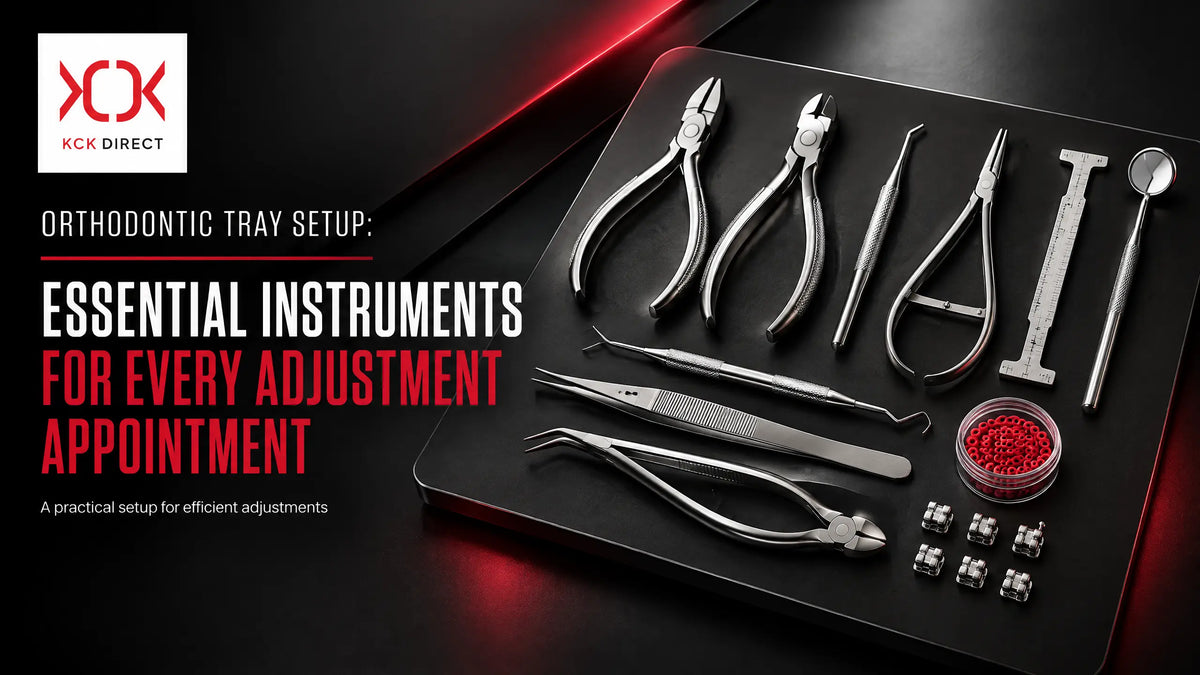
A routine orthodontic adjustment appointment requires a well-prepared tray. The setup usually starts with basic examination tools and moves toward instruments used for wire, bracket, and ligature management.
It may also include consumables and other accessories needed for the planned procedure.
Tray preparation should match the appointment and the type of appliance being treated. Collecting every orthodontic instrument is not always practical or necessary.
A procedure-specific setup helps clinicians keep the tray organized and quickly access the instruments they need.
This guide explains what a routine orthodontic adjustment appointment involves and which basic instruments should be included in the tray. It also covers the instruments used for adjustment and wire management, along with their specific uses. So, you will get a clear overview of the essential instruments needed for common orthodontic adjustment procedures.
What Does a Routine Orthodontic Adjustment Appointment Involve?
A routine orthodontic adjustment appointment usually takes about 15 to 30 minutes, depending on the appliance and the required adjustments.
The orthodontist first examines the teeth, bite, and orthodontic appliance to assess progress since the previous visit. The clinician then removes, adjusts, or replaces components as needed to continue the planned tooth movement.
The typical workflow includes:
- Examine the teeth and appliance: Check tooth movement, alignment, bite, and overall treatment progress.
- Check appliance components: Inspect brackets, bands, tubes, archwires, ligatures, and other active components for any damage or displacement.
- Remove existing components when needed: Remove elastic or metal ligatures and the existing archwire when the planned adjustment requires it.
- Adjust or replace the archwire: Bend, activate, trim, or replace the archwire based on the current treatment stage. A different wire size or type may be selected when required.
- Adjust active components: Modify or add power chains, elastomeric modules, coil springs, or other components to support specific tooth movements.
- Replace ligatures and elastomeric components: Place new elastic or metal ligatures to secure the archwire to the brackets. Elastomeric components may also be replaced or added as planned.
- Check the appliance: Ensure the brackets, wire, ligatures, and other components are secure and properly positioned.
- Check occlusion and comfort: Check for wire interference, cheek or gum irritation, and other areas of discomfort. Trim or adjust the wire if necessary before completing the appointment.
Which Basic Instruments Should Be on Every Orthodontic Adjustment Tray?
The basic tray should contain instruments for examination, visibility, handling small components, and simple appliance adjustments. The exact setup may vary with the appliance and planned procedure.
- Mouth mirror — Provides visibility and helps examine the teeth, brackets, wires, and other appliance components.
- Explorer — Helps check tooth surfaces and inspect areas around brackets, bands, and other components.
- College tweezers — Helps pick up and place small materials and orthodontic components.
- Cotton pliers — Helps handle cotton rolls, gauze, and other small items during the procedure.
- Orthodontic probe/explorer — Helps assess brackets, bands, wires, and other appliance components.
- Ligature director — Helps position and tuck ligatures and other auxiliaries around the brackets.
- Mathieu plier — Helps place and handle elastic or wire ligatures and elastomeric modules.
- Basic orthodontic utility plier — Supports general handling, holding, and adjustment of orthodontic components.
- Bracket positioning/removing instrument — Can be included when the appointment involves bracket placement, repositioning, or removal.
- Distal end cutter — Cuts the distal end of the archwire and helps prevent sharp wire ends from irritating the soft tissues.
- Weingart utility plier — Helps hold, place, remove, and control archwires during adjustment.
- Wire cutter — Provides general wire-cutting support when the procedure requires it.
- Scaler or sickle instrument — May help remove small deposits or excess material around brackets and appliance components when needed.
- Cotton rolls and gauze — Support moisture control, visibility, and basic chairside handling during the adjustment.
Which Instruments Are Used for Orthodontic Appliance Adjustments?
The instruments used for an orthodontic adjustment depend on the appliance and the planned procedure. Clinicians do not need every orthodontic instrument for every appointment. They should select the instruments that match the wire, bracket, ligature, band, or auxiliary being adjusted.
Common instrument groups include:
- Pliers for wire handling and adjustment: Weingart pliers help hold, place, and control archwires. Three-prong pliers can help make bends in the wire. Bird beak pliers support wire bending and loop formation. The choice depends on the type of wire and the required adjustment.
- Cutters for ligatures and wires: Ligature cutters help cut wire or ligature ties. Distal end cutters trim the excess archwire behind the molar tube. The correct cutter helps create a clean cut and reduces the risk of sharp wire ends.
- Pliers for ligature and elastomeric placement: Mathieu pliers help place and remove elastic or wire ligatures. Ligature-directing instruments help position and tuck ligatures around brackets. These instruments make ligature placement more controlled.
- Instruments for bracket and attachment handling: Bracket removing pliers help remove bonded brackets when required. Bracket positioning instruments help place or reposition brackets during bonding procedures. The instrument should match the bracket design and the procedure being performed.
- Band-related instruments: Band seaters and band-removing pliers help place, seat, adjust, or remove orthodontic bands. The clinician should select the instrument based on the type and position of the band.
- Specialized appliance-adjustment instruments: Some appointments require instruments for specific auxiliaries or appliances. These may include instruments for power chains, coil springs, elastics, expansion appliances, or other orthodontic components. The tray should include these only when the planned adjustment requires them.
For a broader overview of common orthodontic pliers and their uses, see KCK Direct's orthodontic pliers guide for beginners.
What Instruments Are Needed for Common Adjustment Tasks?
|
Adjustment Task |
Common Instruments & Description |
|
Routine examination |
Mouth mirror, explorer, and tweezers help examine the teeth and appliance. |
|
Ligature removal |
A ligature cutter and Mathieu plier help remove elastic or wire ligatures. |
|
Elastomeric module placement |
A Mathieu plier and ligature director help place and position elastomeric modules. |
|
Wire adjustment |
Appropriate orthodontic pliers help hold, bend, and adjust the archwire. |
|
Wire cutting |
A distal end cutter or suitable wire cutter helps cut excess wire. |
|
Bracket handling |
A bracket holder or positioning instrument helps hold and position brackets when required. |
|
Band adjustment |
A band pusher, band seater, or band-specific instrument helps seat or adjust orthodontic bands. |
|
Appliance adjustment |
Appliance-specific pliers and instruments help adjust the components of the appliance being treated. |
Which Additional Instruments Should Be Added for Different Appliances?
The basic orthodontic tray provides the instruments needed for examination and routine handling. The clinician should add appliance-specific instruments based on the treatment being performed. This keeps the tray organized and avoids unnecessary instruments.
Fixed Braces
Fixed braces may require additional instruments for archwire and bracket management.
- Wire-handling instruments help hold, place, bend, and adjust archwires.
- Wire cutters help cut excess archwire and ligature wire.
- Ligature instruments help place, remove, and position elastic or wire ligatures.
- Bracket-related instruments help with bracket positioning, handling, or removal when required.
Ceramic Braces
Ceramic brackets require careful handling to reduce the risk of damage.
- Use instruments suitable for ceramic bracket handling.
- Keep appropriate cutters for the wires and ligatures used with the appliance.
- Add suitable removal or adjustment instruments when the procedure requires bracket adjustment or removal.
Removable Appliances
Removable appliances need instruments that match their design and adjustment needs.
- Appliance-specific pliers help adjust wires, clasps, and other components.
- Adjustment instruments help activate or modify the appliance as planned.
- Include the components and accessories required for the specific appliance.
Other Orthodontic Appliances
Other appliances may require a different set of instruments. Add instruments based on the appliance design and the planned adjustment. Check the appliance components before the appointment and prepare only the instruments needed for that procedure.
How Should an Orthodontic Adjustment Tray Be Organized?
A well-organized orthodontic tray helps the clinician work efficiently during the appointment. Arrange the instruments in the order they will be used. Keep the most frequently used instruments within easy reach.
Organize the tray according to the appointment workflow:
- Examination instruments: Place the mouth mirror, explorer, tweezers, and other basic examination tools first.
- Removal and cutting instruments: Keep ligature cutters, wire cutters, and other cutting instruments together.
- Adjustment instruments: Place wire-bending pliers, utility pliers, and other adjustment instruments next.
- Placement and handling instruments: Keep Mathieu pliers, ligature directors, and similar instruments ready for placing and handling components.
- Procedure-specific instruments: Add instruments required for the specific appliance or adjustment. Keep them separate from the basic instruments when possible.
Also consider the following points:
- Keep frequently used instruments immediately accessible.
- Keep procedure-specific instruments separate and clearly arranged.
- Avoid overcrowding the tray with instruments that the appointment does not require.
- Check each instrument for damage, wear, or poor function before setup.
- Follow appropriate cleaning, sterilization, and handling procedures for reusable instruments.
- Maintain a consistent tray layout so the clinical team can quickly identify and reach each instrument.
For more guidance on cleaning, handling, and maintaining orthodontic instruments, see KCK Direct's Orthodontic Instruments Maintenance and Care Guide.
Conclusion
A good orthodontic adjustment tray should match the planned procedure and the appliance being treated. Basic examination and handling instruments form the foundation of the setup. Clinicians can then add the required pliers, cutters, bracket or band instruments, and appliance-specific tools based on the appointment.
This approach avoids unnecessary instruments and keeps the tray easy to manage. Good organization also reduces unnecessary instrument handling and supports a smoother clinical workflow.
Before each appointment, check that the required instruments are clean, functional, and ready for use. For dental professionals and clinics building or updating their practice inventory, KCK Direct offers orthodontic instruments and related dental supplies for different clinical needs.
FAQ’s
1) What instruments are needed for a routine orthodontic adjustment?
A routine orthodontic adjustment usually needs basic examination instruments, orthodontic pliers, cutters, and ligature instruments. The exact setup depends on the appliance and the adjustment planned. Common instruments include a mouth mirror, explorer, tweezers, Mathieu pliers, Weingart pliers, ligature cutter, and distal end cutter.
2) What pliers are commonly used during orthodontic appointments?
Common orthodontic pliers include Weingart pliers, bird beak pliers, three-prong pliers, Mathieu pliers, and utility pliers. Clinicians use these pliers to hold, bend, place, adjust, or remove wires and other orthodontic components.
3) What instruments are needed for ligature placement and removal?
Clinicians commonly use Mathieu pliers and ligature directors for placing and positioning elastic or wire ligatures. A ligature cutter helps remove or cut wire ligatures when needed.
4) Do orthodontic adjustment trays need appliance-specific instruments?
Yes. The tray should include additional instruments based on the appliance and the planned procedure. Fixed braces, ceramic braces, removable appliances, and other orthodontic appliances may require different pliers, cutters, or adjustment instruments.
5) How should orthodontic instruments be organized on a tray?
Arrange the instruments according to the appointment workflow. Keep examination instruments first, followed by cutting and removal instruments, adjustment pliers, placement instruments, and procedure-specific tools. Keep frequently used instruments easy to reach and avoid overcrowding the tray


Last Chance Deals


Last Chance Deals


Last Chance Deals


Rs. 2,600.00
Rs. 3,400.00
24% Off

Last Chance Deals


Last Chance Deals


